Showing posts with label chocolate. Show all posts

April 19, 2012

Blueberry Buttermilk Cake with Chocolate Honey Ganache


I wasn't going to post about this cake. To be honest, I'm a bit embarrassed about the way that it turned out. I know people make mistakes with cooking all the time. The above picture makes it look okay, but it looked worse in real life. But really, this blog isn't about gaining perfection (no matter how nice that would be!), it's about trying out new things, or new recipes anyway and posting about my experiences.

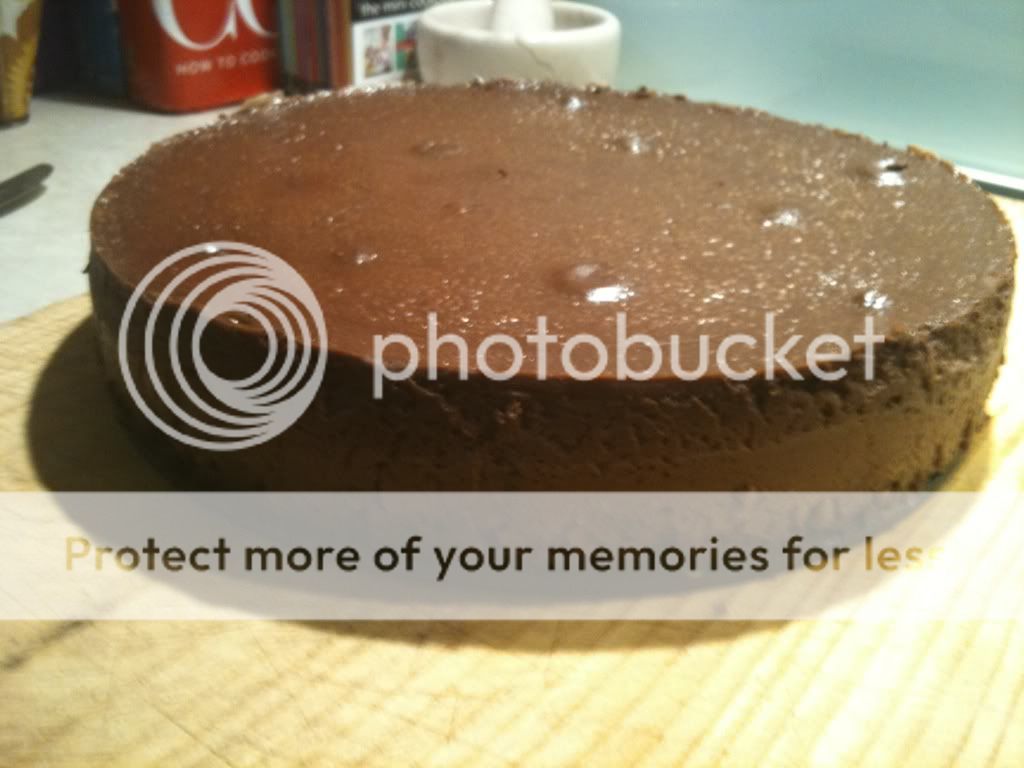
I'm not sure exactly what happened - whether there were too many blueberries, or whether the blueberries all sunk to the bottom of the tin for some reason, or whether I had the wrong size/shape tin - but half of the cake ended up sticking to the tin and falling apart. I managed to put it back together, but it wasn't very pretty. Not like the pictures from the blog I got the recipe from - Raspberri Cupcakes. But I must say, it tasted delicious! The cake was moist and lemony and the chocolate honey ganache was very rich and sweet.
The cake was for my sister's baby shower my family was throwing for her. When I say baby shower though, it's very low key and just our immediate family. It's become a little tradition for our family, since none of us sisters are really into the big events that baby showers can turn into these days. Although I must admit the food that usually comes with those events is so adorable. Anyway, I wanted to make something a bit special especially since it's my sister's first. And she deserves it, just for being my amazing, beautiful big sis!
If I was going to point out one thing I'd change about the cake it would probably be to omit the ganache the next time I make it. I'm not sure if I've mentioned this before but despite all the sweet things I love to make, I'm not actually that much of a sweet tooth and I found the ganache to be a little too sweet for me. I think it was just me though - everyone else enjoyed it. :)
Blueberry Buttermilk Cake with Milk Chocolate Honey Ganache
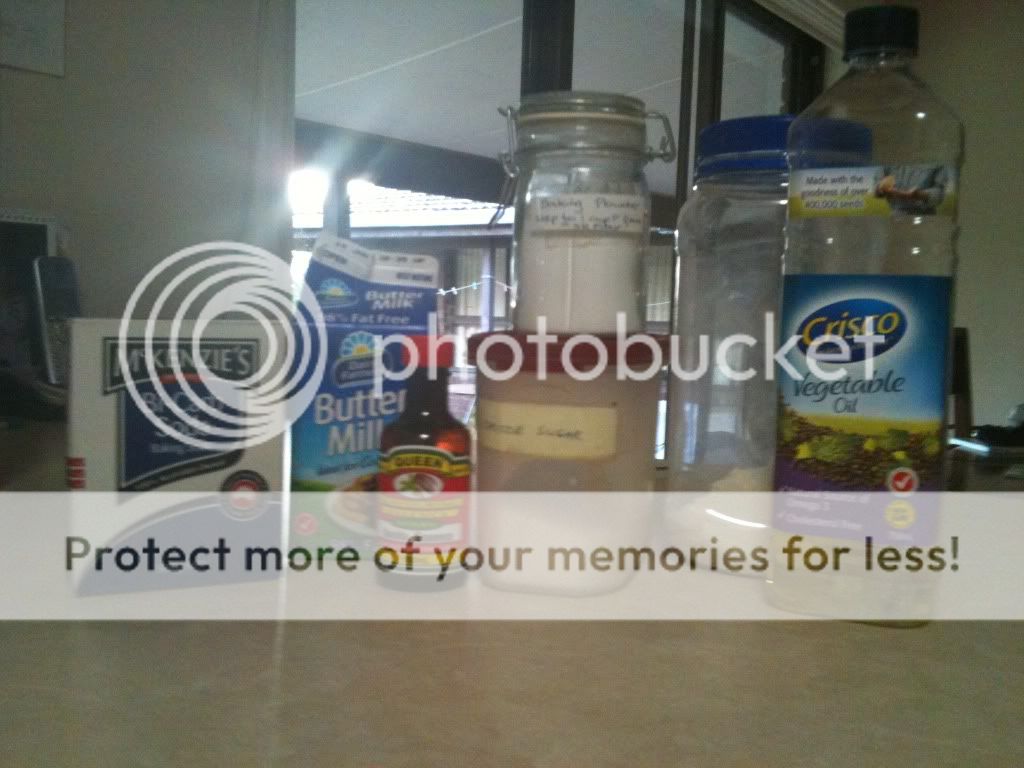
165g softened butter
200g caster sugar
2 eggs
1/2 tsp vanilla bean paste
Rind of 1 lemon
200g plain flour
100g self-raising flour
1/3 tsp bicarbonate of soda
pinch of salt
230ml buttermilk
125g bluberries, fresh or frozen

Ganache
200ml cream
200g milk chocolate
6 tbsp honey
Blueberries to decorate (optional)
Method:
1. Preheat oven to 160C. Grease and flour a bundt pan.
2. In the bowl of an electric mixer beat together the butter and sugar until creamy. Add the eggs one at a time, mixing between each addition, then add vanilla and lemon rind.
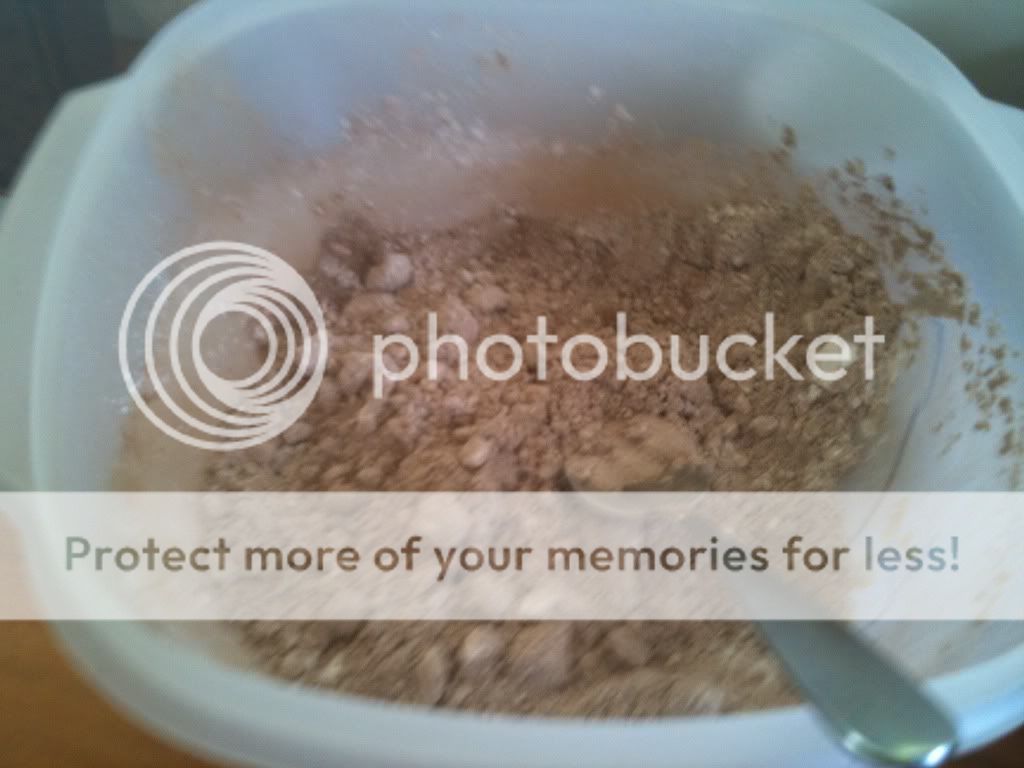
3. In a seperate bowl sift together the flours and bicarbonate of soda with a pinch of salt. With the mixer on low speed, add half of the flour mixture and then half of the buttermilk. Repeat with the other half of the flour and buttermilk.
4. Add the blueberries to the mixture, and gently stir in by hand until just combined.
5. Pour the mixture into your prepared cake tin making sure the top is smooth and then bake for 45-50 minutes (or until cake is golden and an inserted skewer comes out clean). Cool in the tin for approximately 10 minutes and then turn out onto a cake rack and cool completely.
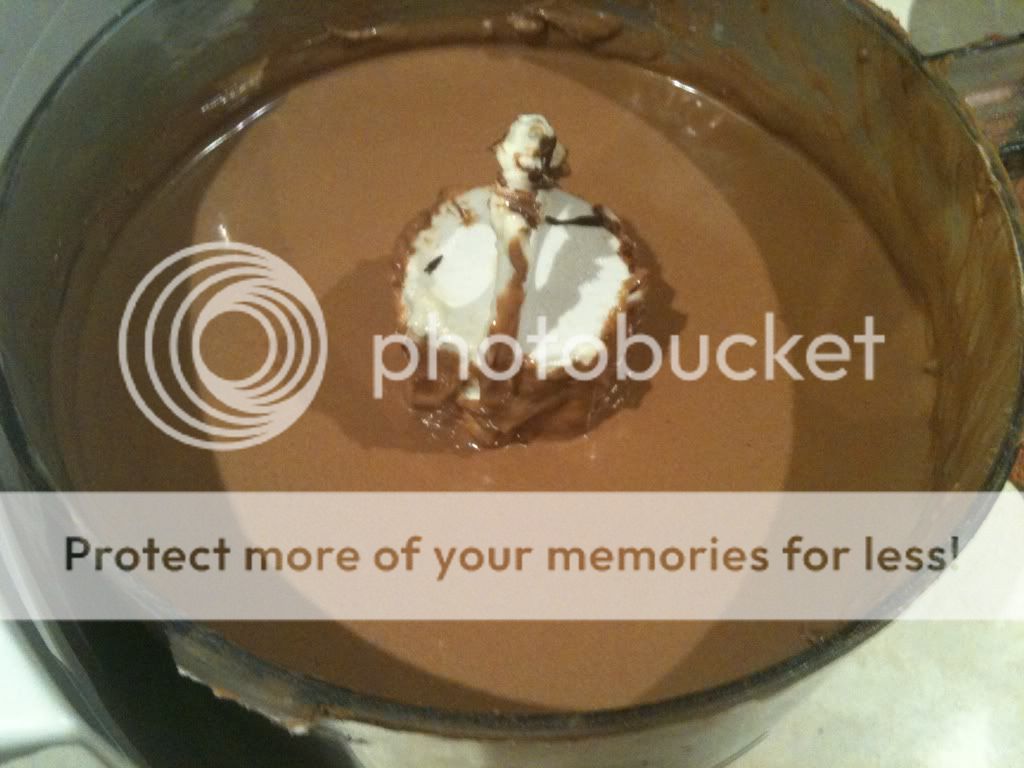
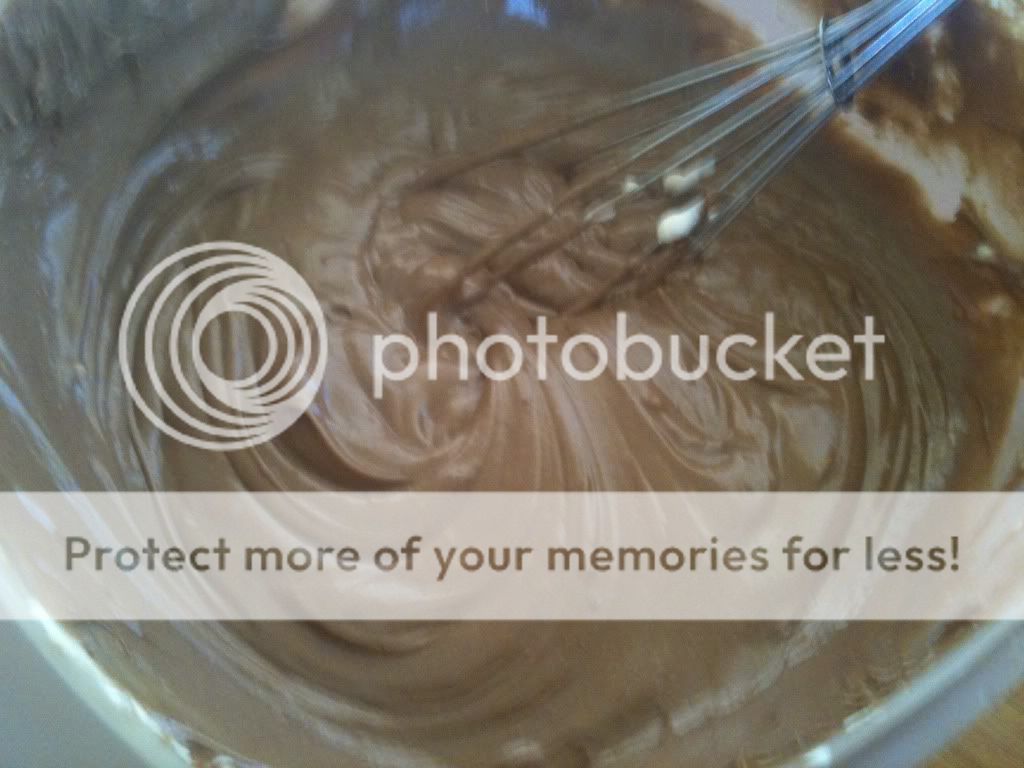
6. To prepare the chocolate honey ganache - in a small saucepan over medium heat bring the cream and honey just to the boil. Remove the pan from the heat and add the chocolate to the hot mixture. Leave for a minute to allow chocolate to melt, then stir until the mixture is smooth.
7. Set the ganache aside to cool completely and then chill it in the fridge until cold and thick.
8. To serve, pour the ganache over the top of the cake and decorate with fresh blueberries (if you wish). Serve immediately.
Hmm....do you think someone went a touch overboard with the ganache? Oops! There was a lot of it though - couldn't let it go to waste ;)

Recipe Source:
Blueberry Buttermilk Cake and Chocolate Honey Ganache recipe from

March 29, 2012

Easter Flashback

Easter to me has always been full of chocolate and hot cross buns. Chocolate that I'd nibble at every so often and that would suddenly disappear one day (into the depths of my Dad's stomach I'm sure!) and hot cross buns full of juicy sultanas, toasted and topped with melted butter. Hmm....I'm just drooling thinking about it! (Ahem, too much information?) Two of my favourite recipes that I've posted about just happen to cover both of these things, so that's why I thought I'd do a sort of flashback post!
I posted about these delicious Cinnamon Choc Chip Hot Cross buns just last year and I'm really tempted to make them again this year. They're not your regular hot cross buns but are a combination of chocolate and cinnamon and taste amazingly similar to a cinnamon scroll. They're so easy to make, which really surprised me and go great with a cup of coffee!

And then there's the Lindt Chocolate Easter Cheesecake which was absolutely divine! This cheesecake is chocolate overload - the actual cheesecake has 70% dark lindt chocolate in it and then in the middle of all that rich chocolatey goodness are some Lindt balls and eggs in the middle - need I say more!

December 23, 2011

Chocolate covered pretzels

Over the past few years it's become a Christmas tradition for all of the family to head up to my sister's house and, with some of my sister and brother in law's friends watch the Carols on TV together. It's always a great way to start the Christmas celebrations off - although I'm sure having to hear me sing (or attempt to) slightly ruins it for everyone else ;)
To make it easier on my sister we always bring a dish along each, whether it's sweet or savoury. This year I decided to make some chocolate covered pretzels. I've made these milk and white covered pretzel sticks in the past and they were a hit - but after seeing these beautiful rounder pretzels on Sweet Verbena I had to give them a try. It's a very simple treat to make, although a little time consuming but if you have a movie or something playing in the background time tends to go much quicker. The pretzels would also make a really nice gift, just fill up a jar, tie a nice ribbon around the lid and add a label or gift tag.
I dipped my pretzels in both white and milk chocolate and also added some sprinkles to some.
All you have to do is melt your chocolate over the stove with a spoonful of crisco. Once it's melted dip your pretzel into the chocolate, pick up with a fork and tap on the side of the bowl to remove any excess and then sit the pretzel on a baking tray covered with baking paper, or on a wire cooling rack until the chocolate is set. If you want to add sprinkles make sure you do it as the chocolate is drying.
h

December 17, 2011

Edible Gifts - Cowgirl Cookie Jar Mix

Can you believe there's only a week to go til Christmas?! It's really snuck up on me this year and I feel so disorganised. I only put the Christmas tree up last week, my cards were posted on Friday and I've barely started my Christmas shopping. My family does KK each year so we each get something big that we really want. That means that my sisters and I don't give each other presents (unless we've drawn each other for KK) but this year I decided to surprise them with a little gift each. This jarred cookie mix, that I found on Bakerella, was perfect, it was an affordable gift, but still very effective with the layers of dry ingredients in the jar. Plus home made gifts are always that little bit more meaningful. (BTW, please forgive the date stamp on the photos - I was using someone else's camera and didn't realise that setting was on).
I found these M&Ms that have been released for Christmas so I thought these would be perfect for my jars. My sisters all absolutely love white chocolate too, so I thought I'd add a few of those along with the milk choc chips.
Bakerella even created some printable labels that I used. On the back there's another label with the directions (US temperatures and measurements). I had a little trouble with these, I'm not sure if it was the round labels or the curve of the jars but I just couldn't get them to stick without having at least one crease in the label. Plus, as you can see I decided against having fabric over the lid. I had wanted to put some red or green fabric there but it didn't really go with the pink label, plus with the jars I got the lid was a bit awkwardly shaped.
This is my beautiful nephew Lenny - do you think he was impressed? :)
Ingredients (makes one 1 litre jar)
Layer your ingredients in your jars in the following order (and make sure you pack the ingredients in really tight - otherwise they won't all fit):
1 1/3 cup plain flour, spooned into measuring cup & leveled
1 tsp baking powder
1 tsp baking soda
1/4 tsp salt
1 cup rolled oats
3/4 cup M&Ms
3/4 cup chocolate chips
1/2 cup brown sugar, packed
1/2 cup white sugar
1/3 cup chopped pecans

Method:
1. Empty your jar of dry ingredients into a bowl and mix together.
2. Add 1 slightly beaten egg, 1/2 cup butter (melted slightly in the microwave) and 1 tsp vanilla and mix together - you might have to get your hands dirty for this (don't put them in your mixer like I did before I'd read the instructions properly - this apparently breaks up the M&Ms which makes the colour bleed a little - duh!)

3. Roll your dough into balls and place on a baking paper covered baking tray for about 10 minutes in a 180 C oven. 
These cookies are great because you can make them specific to whichever holiday you are celebrating at the time. Bakerella added pink M&Ms in hers, so you can really add whichever colours you like. 
Recipe Source:
Bakerella's 

Cowgirl Cookie Jar Mix


In a 1 litre jar layer the dry ingredients in the following order:


First - flour, baking powder, baking soda and salt
Second - oats
Third: M&Ms
Fourth - chocolate chips
Fifth - brown sugar
Sixth - white sugar
Seventh - chopped pecans


Make sure that you pack each level down very tightly. This is important as you may not fit in all the ingredients otherwise. So push down really well!
Wet ingredients:
1 egg, lightly beaten
1/2 cup butter (almost melted in the microwave)
1 tsp vanilla

To make the cookies:
1. Empty your jar of ingredients out into a bowl and mix together.
2. Using a wooden spoon (or your hands if need be) mix in the wet ingredients.
3. Roll your dough into balls and place on a baking tray which has been covered with baking paper
4. Bake for about 10 minutes in a 180C oven.
5. Remove from tray and cool on a wire rack.


August 10, 2011

Milk & White Chocolate dipped Pretzels

While I was scrolling through and reading the entries on one of my favourite blogs, Cupcakes and Cashmere, recently I came across this idea of taking pretzel rods and dipping them into chocolate and sprinkles. It's a very simple concept that I'd never thought about before, but the result is a very effective and very tasty dessert. A while ago I tasted the pretzel M&M's, which were delicious, but I'd never thought of trying to recreate this effect until I saw this recipe. When I told people that I was going to make these chocolate dipped pretzels for my niece's 1st birthday I got a lot of odd looks and 'but pretzels with chocolate?!' comments, but despite the oddity, this combination actually does work! Trust me and try them. You won't regret it! :)
You will need pretzels that are bigger than usual. I had a bit of trouble finding large pretzel rods, but luckily the day before the birthday I managed to find some in a little deli. They probably weren't as big as I had imagined (or as the ones used on Cupcakes and Cashmere) but they did the job and still looked effective. I chose to use both milk and white chocolate to dip the pretzels in, just to have a couple of different options. I'm sure you could use dark chocolate, but I'm not a big fan personally, and plus it was enough work with the two chocolate. I melted the chocolate (seperately) by placing it in a saucepan and then placing that saucepan in a larger one half filled with boiling water over medium heat on the stove. Once the chocolate had melted I then dipped the tips of the pretzels into the chocolate.
I let the excess chocolate drip off the sticks and let the chocolate dry a touch so it wasn't so runny before I went on to the next step. I felt that if I rushed it and rolled the tips in the sprinkles too soon they would end up a little messier than I would have liked, and wouldn't have that nice round shape.
I had my various colours of sprinkles ready on plates before I started. I felt these colours suited the theme of the birthday party, which was a sort of garden tea theme, calling for more pastel colours. Here they are laid out on the plates.
So once the pretzels had been coated in chocolate (either milk or white) I then rolled the pretzel ends in the sprinkles until they were nicely covered.
Once I'd done this I found it was easiest to lay the finished pretzel sticks on a cake cooling rack to dry completely before I transferred them into a storage container. They ended up being a hit at the party though. The kids loved the bright colours and were attracted to these straight away (and they ate them all up) and the adults really liked the idea too, with the flavour combination of the salty with the sweet. They took a little bit of effort, as you could really only do a couple at a time, but they were definitely worth it in the end.
Recipe Source:
Found on Cupcakes and Cashmere
Chocolate-dipped Pretzels

April 27, 2011

Lindt Chocolate Easter Cheesecake

Easter for me, growing up, has always meant camping and lots and lots of chocolate. Year after year my parents would pack myself and my three sisters into the car and we'd drive up to the Murray River to camp amongst all the other tents lining the banks of the river. We always had so much fun, there were countless other kids to play with and I loved riding my bike around the dirt tracks and playing in the sand. The weather was always beautiful there with warm sunny days, and cold nights spent next to a huge warm fire. On Easter morning we'd always wake up to find piles of Easter eggs and bunnies at the end of our beds. While, after a while, our camping trips slowly died off - mainly due to the river becoming too crowded over the Easter period - the tradition of waking up on Easter morning to find the 'Easter Bunny' had visited never died off. In fact, just this Sunday I woke up to find a box of my favourite Lindt Stracciatella balls and a white chocolate Cadbury bunny sitting on my bedside table. Which was why, when my sister decided to have a family lunch at her house on Easter Sunday and asked me to make something for dessert, I immediately knew that I had to try to make something chocolatey and extremely decadent! And this recipe that I found, for a Lindt chocolate Cheesecake fit both of those categories. 
Ingredients:
1 pack chocolate biscuits
575g cream cheese
1 tsp vanilla
100ml cream
4 eggs
80g unsalted butter, melted
50g sour cream
200g Lindt 70% Cocoa
140g Caster Sugar
pinch sea salt
6 Lindt Gourmet Eggs
6 Lindt Lindor Balls
To make:

1. Preheat the oven to 120ºC
2. For the base, place biscuits in a food processor and blend until ground reasonably fine. Mix in enough melted butter for mixture to just bind together, press evenly over base of lightly greased tin and smooth it with the back of a spoon. Set aside.
3. For the cheesecake mixture, place cream cheese into an electric mixer and mix until softened. Once the cheese is softened, mix in the sour cream and sugar, continue mixing until smooth.
4. Place cream into a saucepan and gently bring to the boil, remove from heat once boiling. Break up the chocolate and mix into cream, stir until melted and set aside to cool slightly.
5. Mix chocolate into the cheese mixture and once again scrape down sides.
6. Add eggs one at a time, mixing well after each addition.
7. Pour enough cheesecake mixture into the springform to cover the base.
8. Unwrap the gourmet eggs and the Lindor balls and arrange Lindor in a circle in the centre with a circle of gourmet eggs surrounding the Lindor.
9. Gently cover Lindor and eggs with a little cheese cake mixture and lightly tap springform to avoid air pockets.
10. Pour in remaining cheesecake and once again lightly tap
11. Place springform into a deep baking tray and pour about 2 cm deep hot water into the base of the tray. This will aid the cooking process and prevent the cake from becoming dry and crumbly.
12. Bake cheesecake for approximately 60 minutes. The cake is ready when it is set on the sides but remains slightly soft in the centre.
13. Completely cool cake in the springform tin.
And here's the finished product. Let me just say....this cheesecake was delicious! I've never actually tasted a chocolate cheesecake before this one, but it was so smooth and rich and the Lindt balls just added that little bit more decadence! I went to the Lindt store in Melbourne the day before Easter Sunday to buy the Lindt balls and eggs but they didn't have any eggs left so I just used all Lindor balls. I got a couple of different flavours though - some milk chocolate, some milk/white ones and some cookies and cream. Delish!
Recipe Source:
Yahoo Food
Lindt Easter Cheesecake

January 25, 2011

Ultimate Chocolate Chip Cookies

It may seem that I'm obsessed with chocolate chip cookies (okay I sort of am) but they're just so easy to make and great if you need something small to nibble (or scoff) on. I went away again at the weekend with some of my friends and thought these would be perfect to take with us, especially when I saw their name. Ultimate chocolate chip cookies? How could I resist!? I took half of the batch away with me over the weekend and I couldn't believe how fast these disappeared! We got down to the beach on the Friday afternoon and they were gone by the end of the next day. My friend's said that they were to die for and I actually had to agree with them. I thought my last recipe that I'd found was fantastic, but these are just that much better! Again, these were also a Martha Stewart recipe. :)
Ingredients:
3 1/2 cups flour
1 1/4 tsp baking soda
1 1/4 tsp baking powder
2 tsp salt
315g unsalted butter, room temp
1 1/2 cups packed brown sugar
1 cup caster sugar
2 large eggs
1 1/2 tsp vanilla
440g chocolate (both white and milk chocolate)
1. Preheat oven to 180 degrees Celsius. In a bowl, whisk together flour, baking soda, baking powder and salt.
2. In a large bowl, using an electric mixer, beat butter and sugars until light and fluffy. Reduce speed and beat in eggs, one at a time. Beat in vanilla. Mix in flour mixture just until incorporated; fold in chocolate.
3. Using a 1/4 cup scoop (I actually just grabbed bits of dough and made smaller balls because I like smaller cookies - these still came out quite big though) and refrigerate 1 hour. 
4. Arrange 6 unbaked cookies on each of two baking paper lined trays. Bake cookies until light golden brown, approx 15 minutes. Transfer cookies to a wire rack and let cool. 

Recipe Source: Martha Stewart website

January 17, 2011

Soft and Chewy Chocolate Chip Cookies

I just got back from a weekend away with my sisters and their partners and my beautiful niece and nephew. We hired a house down in a small town called Barwon Heads which is on the coast here in Victoria. To make things a little bit more affordable we all decided to bring a few food products each, so I decided to cook some Chocolate chip cookies. These cookies are great if you're after something quick, simple and tasty to bake. I always put a nicer eating chocolate in, rather than cooking chocolate, because I like the taste better. I like to put both white and milk chocolate in them too and I always put a little bit more in than asked for in the recipe. There's definitely nothing wrong with more chocolate! If you like your cookies soft and chewy rather than crunchy then these are perfect for you.
Ingredients:
2 1/4 cups plain flour
1/2 tsp baking soda
250g butter, room temperature
1/2 cup caster sugar
1 cup packed brown sugar
2 tsp vanilla
2 eggs
2 1/2 cups white and milk chocolate chips
1. Preheat oven to 180 degrees. In a bowl, whisk together the flour and baking soda; set aside. In a bowl of an electric mixer combine the butter with both sugars; beat on medium speed until light and fluffy. Reduce speed; add the vanilla and eggs. Beat until well mixed, about 1 minute. Add flour mixture; mix until just combined.
2. Add in chocolate chips and mix well.
3. Drop heaping tbsp size balls of dough about 2 inches apart on baking sheets lined with baking paper.
4. Bake until cookies are golden around the edges, but still soft in the centre, 8-10 minutes. Remove from oven, and let cool on baking tray 1-2 mins. Transfer to a wire rack, and let cool completely.

Recipe from: Martha Stewart


January 11, 2011

One-bowl Chocolate Cake

It was my brother-in-laws birthday a couple of days after New Years Eve. The night before (at about 9pm and still a little wiped out from the night before) I sent a text off to my sister asking her whether she had a cake organised or whether she wanted me to 'whip something up'. I got a text back saying 'That'd be great, he loves chocolate!' I started scrolling through the chocolate cake recipes on the Martha Stewart website and came upon the One-Bowl Chocolate Cake which looked lovely, and I thought I should have all the ingredients to go in it. Yes, folks, should is a great word isn't it?! It turned out that we were completely out of eggs! This coming from the girl who has half a dozen chickens out the back. Plus we had none of the ingredients for the icing! Luckily enough my other sister came to the rescue - they had tonnes of eggs. So I decided to pick up the ingredients for the icing on my way in and just finish baking the cake at her place. So for me, this cake ended up being a two bowl cake rather than the promised one bowl, as I thought I should prepare the wet and dry ingredients that I had and take them separately.
These are just the ingredients I did actually have. The recipe also asked for something called safflower oil, which we didn't have so I substituted it for vegetable oil.
Ingredients:
unsalted butter, softened, for pans
3/4 cup unsweetened Dutch cocoa powder, plus more for pans
1 1/2 cups plain flour
1 1/2 cups sugar
1 1/2 tsp baking soda
3/4 tsp baking powder
3/4 tsp salt
2 large eggs
3/4 cup buttermilk
3/4 cup warm water
3 tbsp vegetable oil (original recipe calls for safflower oil)
1 tsp vanilla
1. Preheat oven to 180 degrees. Butter two round cake pans (2 inches deep); dust with cocoa. Sift cocoa, flour, sugar, baking soda, baking powder, and salt into the bowl of a mixer. Beat on low speed until just combined. Raise speed to medium, and add eggs, buttermilk, water, oil and vanilla. Beat until smooth, about 3 minutes.
2. Divide batter between pans. Bake until set and a toothpick inserted into the centres comes out clean, about 35 minutes. Let cool for 15 minutes. Turn out from pans. Transfer, faceup, to wire racks. Let cool completely.
3. Spread 2 cups chocolate icing onto top of 1 cooled layer. Top with remaining layer; frost top and sides with remaining 2 cups icing.

Icing Ingredients:
2 1/4 cups icing sugar
1/4 cup cocoa powder
Pinch of salt
170g cream cheese, room temperature
190g unsalted butter, softened
255g bittersweet chocolate, melted and cooled slightly
3/4 cup creme fraiche or sour cream
1. Sift together sugar, cocoa and salt.
2. Beat cream cheese and butter with a mixer on medium-high speed until smooth. Reduce speed to medium-low; gradually add sugar-cocoa mixture, and beat until combined. Pour in chocolate in a slow, steady stream. Add creme fraiche; beat until combined.
This is the first half of the cake covered. I found that the amount of mixture made two quite thin cakes, so you could probably put all the mixture in and just make one bigger cake if you want to. I also had a LOT of icing, really more than I needed for the one cake I felt. I had enough left over that I was able to make another of these cakes a couple of days later and there was enough to cover that one too. 
A note for all of you who want to make this cake, make sure you either put the icing in the fridge before you put it on the cake, or once you've put the icing on the cake give it some fridge time. We had to drive to my sister's house as soon as I'd finished putting the icing on, so not only was I in a bit of a hurry, the icing was far too soft, as you can see in the picture above. I literally had to sit in the car holding the top layer of the cake in place because it kept going to slide off! That was definitely a long car ride! Once we got to my sister's house though, I was able to put the cake in the fridge and it all set quite nicely. I took it back out after the icing was a bit more solid and smoothed it down a touch. Here's a picture of the finished product (please excuse the messy plate and the rushed icing job)
This was a wonderful, moist and delicious cake that was really easy to make. I definitely recommend it for anyone, and I can see myself cooking it again in the future. I particularly loved (OMG LOVED!!) the icing! That was the best part of the cake and I found myself, 'tasting' the leftovers every now and then just to 'check they were still okay. ;) 

share post

Facebook