Showing posts with label comfort food. Show all posts

March 23, 2011

Red Velvet Cupcakes

I know I've already posted about Red Velvet Cupcakes on this blog in the past, but I wanted to share them with you again. I can't get enough of these wonderful, soft, moist cupcakes. They're usually my go to when I need something to bake that I know will turn out well, and I often get requests to make them for various occassions. Recently my sister Andrea approached me about doing some baking for my niece, Ruby's christening. She requested these Red Velvet Cupcakes and a White Chocolate Mud cake (which I'll post about soon). I found these beautiful Robert Gordon patty pans in a cooking shop in the Melbourne CBD and just had to buy some to use for the cupcakes. Perfect for a little girl I think!
My sister had about 20-25 people coming so I wanted to aim for everyone to get at least one cupcake each. I started off making just one batch first to see how many I could get, and then made a second batch, ending up with about 30 cakes in total. I was able to stick with one batch of the cream cheese frosting mixture though, as it was enough to cover all the cupcakes.
Ingredients:
2 1/2 cups cake flour (to make cake flour - for each cup of cake flour required replace 2 tbsp of plain flour with 2 tbsp corn flour)
2 tbsp Cocoa Powder
1 tsp salt
1 1/2 cups caster sugar
1 1/2 cups vegetable oil
2 eggs
1/2 tsp red gel food colouring
1 tsp vanilla
1 cup buttermilk
1 1/2 tsp baking soda
2 tsp white vinegar
1. Preheat oven to 350 degrees. Line standard muffin tins with paper liners. Whisk together cake flour, cocoa and salt.
2. With an electric mixer on medium-high speed, whisk together sugar and oil until combined. Add eggs, one at a time, beating until each is incorporated, scraping down sides of bowl as needed. Mix in food color and vanilla.
3. Reduce speed to low. Add flour mixture in three batches, alternating with two additions of buttermilk, and whisking well after each. Stir together the baking soda and vinegar in a small bowl (it will foam); add mixture to the batter, and mix on medium speed 10 seconds.
4. Divide batter evenly among lined cups, filling each three-quarters full. Bake, rotating tins halfway through, until a cake tester inserted in centers comes out clean, about 20 minutes.
Transfer tins to wire racks to cool completely before removing cupcakes. Cupcakes can be stored overnight at room temperature, or frozen up to 2 months, in airtight containers.
5. To finish, use a small offset spatula to spread cupcakes with frosting. Refrigerate up to 3 days in airtight containers; bring to room temperature before serving.

Recipe Source:
Martha Stewart website
Red Velvet Cupcakes

March 9, 2011

Brioche

I love taking advantage of my local library and have recently realised how big of a cookbook collection they have. One night after work I had one of my usual urges to cook, so I thought I'd make something out of one of the cookbooks I'd borrowed. I chose to make the brioche out of the Bourke St Bakery cookbook. I have only ever made bread once (well rolls) and so I wanted to get some more practise in making that. Plus I've always wanted to make my own brioche.
Ingredients:
190g flour, chilled
4g fresh yeast, chilled
15g caster sugar, chilled
1 1/2 tbsp milk, chilled
3 eggs, chilled
1 tsp salt
125g unsalted butter, cut into cubes, at room temp
egg wash (1 egg, 100ml milk & pinch salt combined)

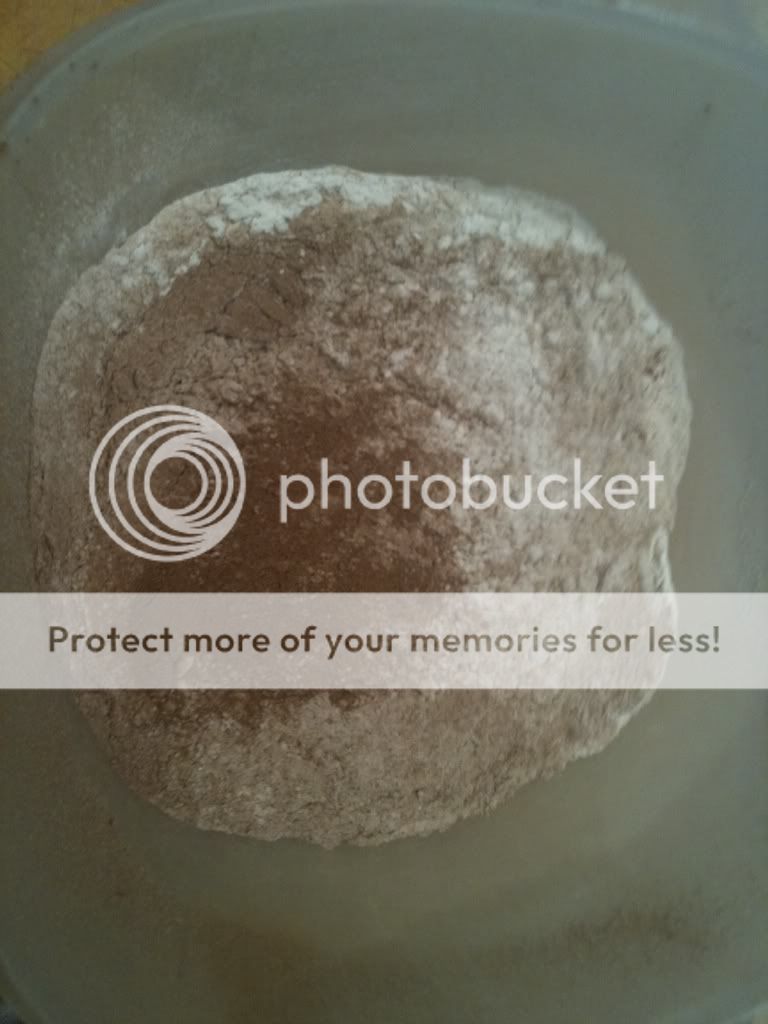
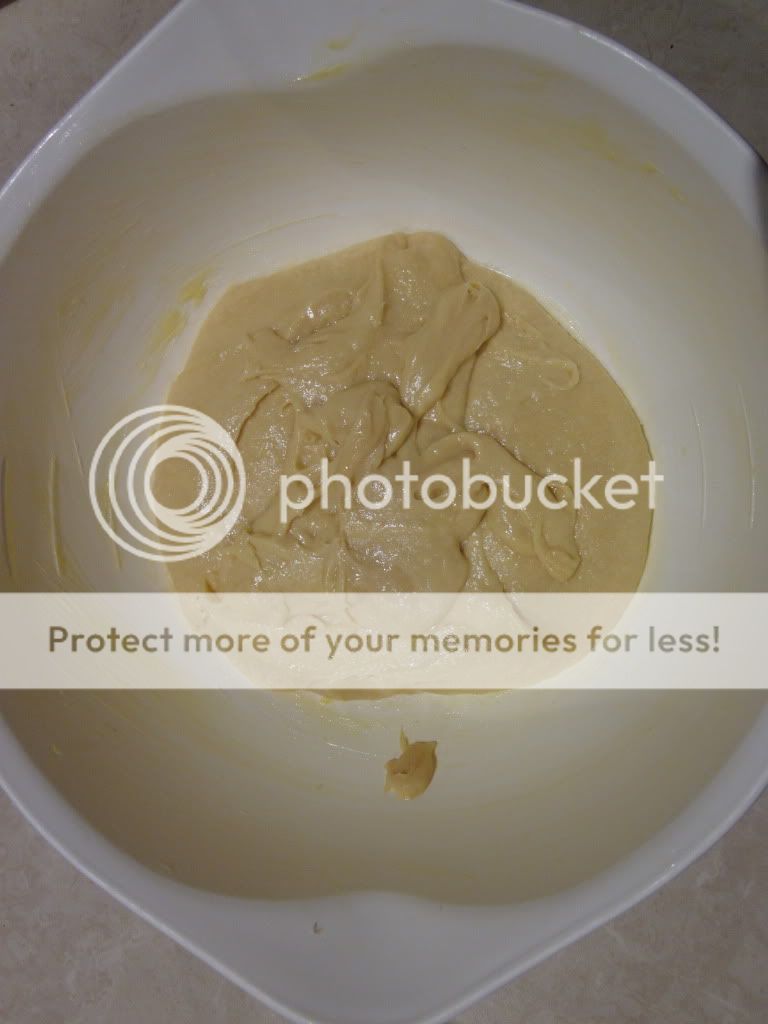
I firstly set the oven at 220 degrees celcius. Then, to make the dough I put the flour, yeast, sugar, milk, eggs and salt into a bowl and mixed them together with an electric mixer. To this mixture I then added the butter, a few pieces at a time until it was all well incorporated. I turned this sticky dough out onto my bench which I'd dusted with flour and kneaded it with floured hands. I then transferred the dough back into a bowl, which I'd brushed with butter and placed it in the fridge for an hour, covered with a tea towel.
After an hour I took the dough back out of the fridge and turned it back onto the bench, pressing it gently into a rectangle shape. I then folded one third of the rectangle back over itself and then the same with the remaining third, so I had a long rectangle. I then turned the dough sideways and repeated the process until I had a square, which I then placed back into the greased bowl, recovered it with the tea towel and placed it back into the fridge for an hour.
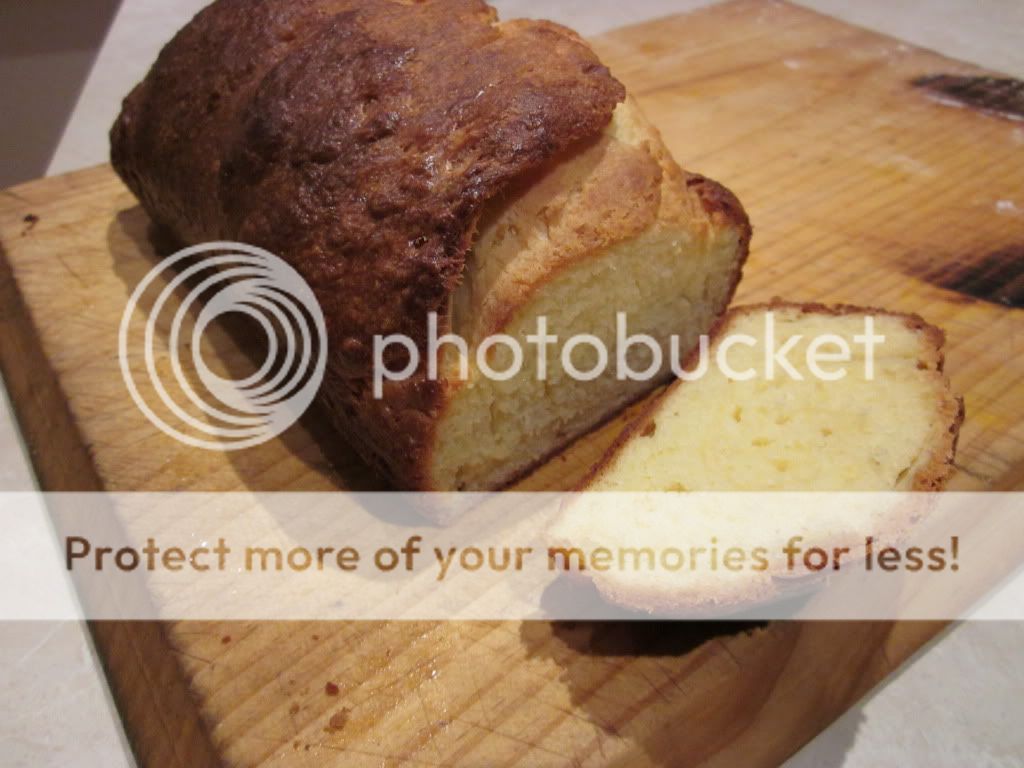
I again had to turn the dough out onto my floured bench and gently knocked the air out of it. I then rolled the dough into a log shape to fit into my pre-prepared loaf tin (greased and lined with baking paper) and placed it in the tin. I then quickly mixed up my egg wash mixture, which was just a matter of whisking the ingredients together and then brushed it on the top of the brioche loaf. I reduced the oven temperature to 180 degrees and baked the brioche for 40 minutes.
The bread turned out really well. It was beautiful and soft when hot, and had a subtle sweet taste to it. By the next morning it had gone a little bit hard, but it was still lovely toasted with my eggs. The only complain that I had was that the instructions about what shape to make the bread, and the process of kneading was a little confusing to me. I'm not sure if I'm the only one, but it seems like this book is maybe geared towards someone who's had a little experience making bread. It was still a very good recipe, and I was very proud once I'd finished to have made my own brioche.

Recipe Source:
Bourke St Bakery: The Ultimate Baking Companion
by Paul Altman and David McGuinness

March 3, 2011

Sausages in (onion) gravy

Do you ever have those days when all you feel like is some good old comfort food, no matter how good or bad it is for you? I had one of those days the other day. I was tired and not feeling very well and all I felt like was one of my favourite dishes from my childhood - Sausages in onion gravy. I know some of you will be horrified by the sound of this dish, but no matter how bad it sounds (and looks) it's really very tasty. Plus it's very easy and fairly quick to make.
Yes, I know, it's not the greatest looking meal...but it's comfort food! :)
You start off with as many BBQ sausages you need. You can use whatever sausages you want here - flavoured or plain, but we usually just get plain ones for this meal. In a frying pan with a little bit of oil fry the sausages until they're brown and cooked through.
Usually I slice a large onion into rings and cook it in the pan with the sausages, however on this occassion we were all out of onions so I decided to replace them with mushrooms. I sliced a few large mushrooms up and added them to the pan with the sausages to cook.
While these were cooking, I put 3 tablespoons of gravy powder (I know, I know) in a small bowl and filled it with water and whisked the two together. Once the sausages and mushrooms were cooked, I poured this gravy mixture over the top and stirred occassionally until the mixture thickened.
And that was it! Very simple, very quick. While I was cooking the sausages I also steamed some vegetables to have on the side - zucchini, carrots and potatoes which I mashed. Mashed potatoes with Sausages in Onion Gravy is a fantastic combination.
I must admit it tasted a little different to how it usually tastes - I'm guessing this is because of the use of mushrooms instead of onions. It was still very nice, but just not as good as usual.

Recipe Source: Family recipe

share post

Facebook