Showing posts with label cupcakes. Show all posts

February 1, 2012

Birthdays Galore

I'm not sure about you, but have you noticed that there's usually one time each year where there seems to be an overload of birthdays? December/January is definitely like this for me - both friends and family members celebrate their birthdays during this time - including me! My birthday is on the 19th (in case you were wondering ;) ) and somehow I managed to spread it out over a few days, what with me being disorganised and everyone not being available on the same day. On the night my sister and her family and my parents got pizza and my Mum made one of my favourite desserts - a beautiful lemon meringue pie.

This is a picture of me and my beautiful nephew Archie (his birthday was in December) and I love it. He was very excited about helping me blow out my candle!
And the beautiful bunch of flowers I got from a lady I work with. I also got another bunch which Archie chose, but unfortunately I forgot to take a picture before they wilted. :( They were very pretty though, and I was touched that he'd picked them out!
And what is a birthday without a funny tale to tell! I just know my mum is going to kill me for posting this picture but I just can't help myself. A few days before my birthday I found a beautiful cake that I asked my mum to make for me. The plan was to take it to the picnic all of my family and I were having, and the night before mum had the cake made and it looked very pretty - but the day of the picnic turned out to be very hot and so when we went to open the container to eat the cake this is what we found -
It still tasted delicious - but as one of my sister's joked this was probably 'what Martha wouldn't do'

As I mentioned in my last post, it was my gorgeous nephew Lenny's 1st birthday on Australia Day (January 26) and so of course his mum and I had plenty of baking to do! B was in charge of the most important thing of course - the birthday cake and (as the theme was of course Australia and Australian animals) she decided to make an echidna cake which, as you can see, turned out really well. How cute is it?!
I was in charge of the cupcakes and I made my usual red velvet cupcakes but attempted to make them look like koalas and echidnas. I couldn't find all the bits and pieces that I'd hoped to use to decorate the cupcakes with, but I think they turned out looking pretty cute.
The Koalas. I used cream cheese icing for the background, raspberry bullets for the noses, more cream cheese icing as well as mini choc chips for the eyes and mini pink marshmallows for the ears.
The Echidnas - Chocolate icing for the background, raspberry bullets for the nose, cream cheese icing and choc chips for the eyes and licorice for the spines.
This is the Australia shaped caramel lamington that I made. I had intended to make mini ones using a cookie cutter I found, but they weren't working out. I ended up printing off an A4 map of Australia and using it as a template to cut the cake out with. It's not quite the right shape - and of course Tasmania is way too big. But it looked very effective in real life - btw the Australian flag has been placed where we live.

I also had to share this with you! A friend of mine invited me out to a bar for her birthday this Friday just past. The bar was called The Croft Institute and had a medical theme with lots of medical tools and gadgets everywhere (there was even a hospital bed in the female toilets apparently). I ended up choosing to have a cocktail called Elixir which was served up in a glass and with a syringe acting as the straw! It was a novel way to serve a drink, and fit in very well with the medical theme of the bar.


May 31, 2011

Maple Walnut Cupcakes with Maple Cream Cheese Frosting

For the past few years for Mothers Day, my sisters and I have put together an afternoon tea for our Mum. We each bring a plate of either sweet or savoury treats (we decide beforehand who will bring sweet or savoury) and spend the afternoon devouring them! This year I was asked to make something sweet so I decided to make a recipe from my Baked Explorations cookbook. I chose this recipe for Maple Cupcakes with maple cream cheese frosting that just looked too good to pass up. And they turned out beautifully too. Not only did they look gorgeous, but they tasted just as good. There was a lovely sweetness from the maple syrup and a nice crunch from the walnuts which I really loved. These are cupcakes I would definitely make again.

Ingredients:
For the Maple Cupcakes
3 cups plain flour
3 tsp baking powder
1 tsp salt
125g butter, slightly softened, cut into chunks
2 tbsp vegetable shortening, at room temperature (I used copha)
2 cups pure maple syrup
3 egg yolks
1 egg
1 1/2 cups milk
1 cup walnuts, toasted and coarsely chopped

For the Cream Cheese Maple Frosting
200g unsalted butter, softened
340g cream cheese, softened
4 cups icing sugar, sifted
2 tbsp maple syrup

Instructions:
1. Preheat the oven to 163 degrees C. Line cupcake pans with paper liners. In a bowl, sift together the flour, baking powder, and salt.
2. In the bowl of a standing mixer, beat the butter and shortening until ribbonlike. Turn the mixer to low and stream in the maple syrup. Increase the speed to medium-high and beat until the mixture is nearly uniform in colour, about 3 minutes.
3. Add the egg yolks and egg, one at a time, and beat until just incorporated. Scrape down the sides and bottom of the bowl.

4. Add half of the flour mixture and mix on low speed until incorporated. Stream in the milk.
5. Stop the mixer, add the rest of the flour, then turn the mixer on until just combined. Scrape down the sides and bottom of the bowl.
6. Fold in the walnuts.
7. Fill the prepared cupcake pan about 3/4 full. Bake the cupcakes for 20 to 25 minutes, rotating the pans halfway through the baking time, until a skewer or toothpick inserted in the centre of a cupcake comes out clean. (Note: these cupcakes take longer to bake than traditional cupcakes due to the maple syrup)
8. Allow the cupcakes to cool for 15 minutes in the cupcake pan, then turn them out onto wire racks to cool completely.
To make the Cream Cheese Maple Frosting:
In the bowl of a standing mixer, beat the softened butter until it is completely smooth. Add the cream cheese and beat until combined. Add the sugar and the maple syrup and beat until smooth. Be careful not to overbeat the frosting or it will lose structure.
Decorate the cupcakes using a piping bag.

Recipe Source:
Maple Walnut Cupcakes with Maple Cream Cheese Frosting from
Baked Explorations Cookbook: Classic American Desserts Reinvented
Baked Explorations: Classic American Desserts Reinvented

May 26, 2011

Cooking Class with Jennifer Graham from the Crabapple Cupcake Bakery

Firstly, a little bit of house keeping. I wanted to let you know that I'll be organising a competition to celebrate my 50th post. I know I'm still new at blogging, and that I haven't been running this blog for long but I thought it would be a bit of fun and a way to get people involved. So keep an eye out! It's not far off - this is my 48th post I believe.

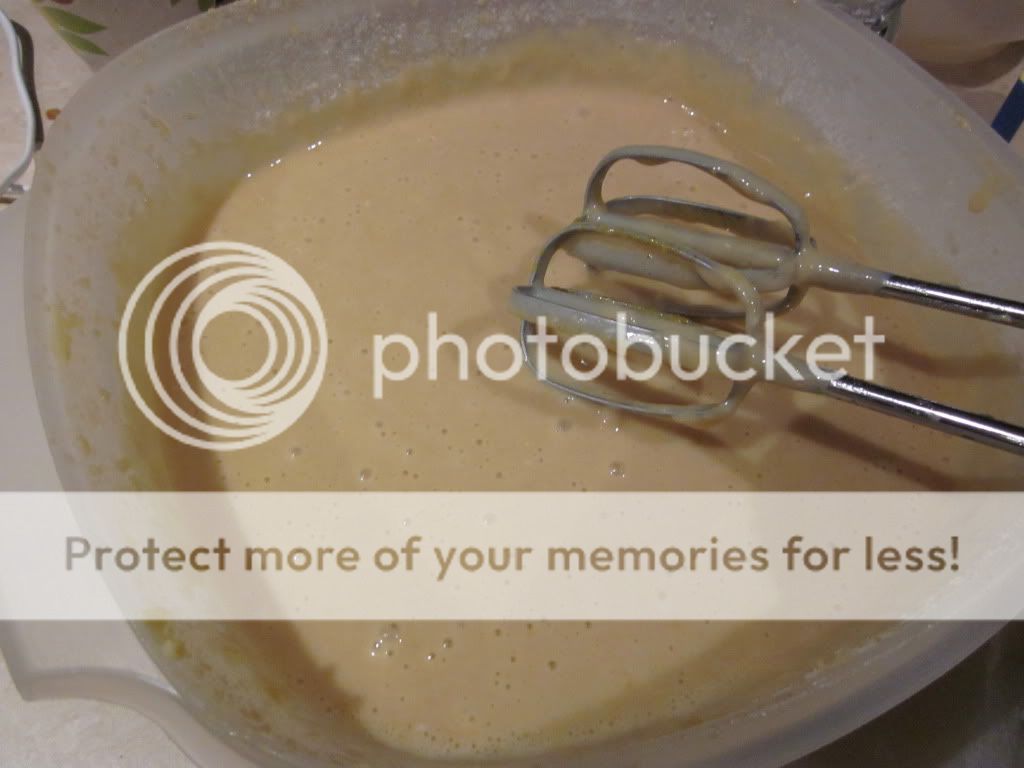
For my birthday earlier this year I was given a voucher by my family to do a cooking class of my choice. Lucky me! I did a bit of research to see what was available around Melbourne, and there was a lot to choose from. I finally found out about a cooking class run by CAE in the Melbourne CBD, and taught by Jennifer Graham the founder of the Crabapple Cupcake Bakery. Jennifer is also the author of a great cookbook which I'd seen in various book stores and considering my love of cupcakes I decided to sign up for the Cupcakes Galore class. There wasn't much of a description on the CAE page, but I knew that whether it was making cupcakes or decorating them, I'd still be interested.
The class was held in what is usually the Journal Canteen restaurant and ran for about 2 and a half hours. There was a good sized group of people there - I think about 15 people ended up coming. I came in nearly last and was welcomed by Jennifer, who seemed very nice, and asked what brought me to the class. I felt a bit silly, because I explained how I loved cooking and my family had paid for me to have a class for my birthday. I have a feeling most of the other people there were planning on using their cupcake decorating skills professionally.
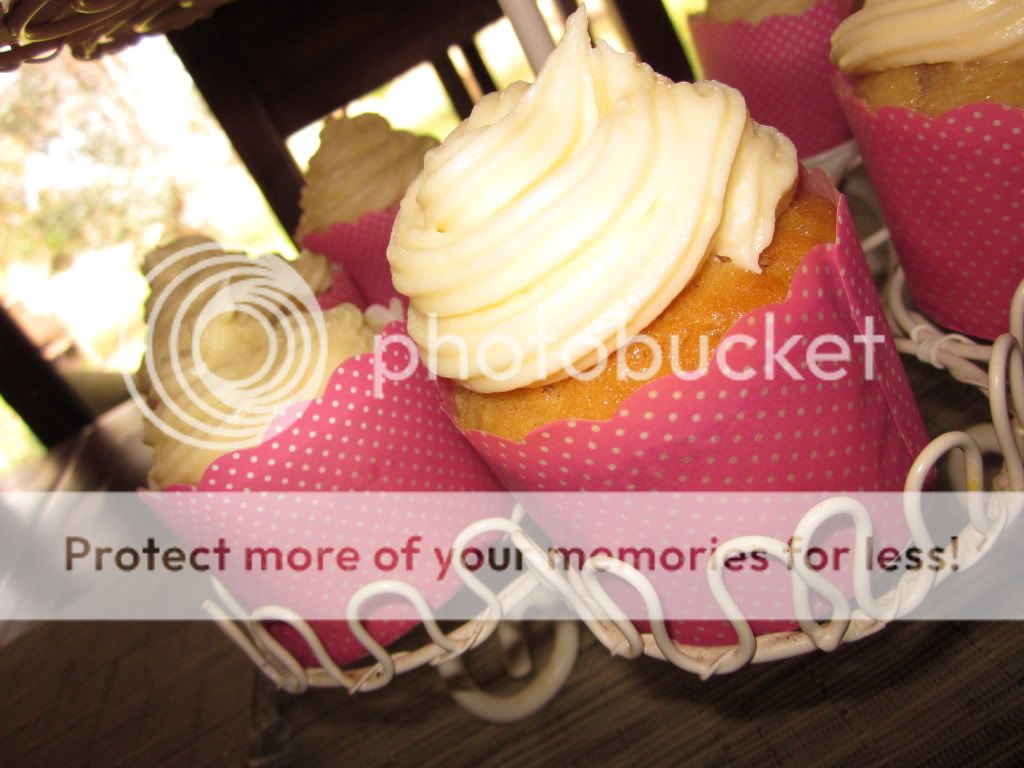
But anyway, Jennifer started off by teaching us how to hold a cupcake properly, something I'd never thought about before. She then went on to teach us how to spread the icing so it was evenly over the cupcake, and so that each cupcake would turn out the same. We then had to make a C shape on both sides of the cupcake to make this Freeform Swirl design. This is my attempt, which I decorated using sprinkles around the outside and a rose:
Jennifer then showed us how to do a Signature Swirl design, which you use for rich icings, such as ganache, where you don't need a lot of it. The instructions were the same as the Free Form Swirl, however instead of making C shapes, you wave your knife over the top of the cupcake to smooth the icing. This is my attempt, which I decorated with one of Jennifer's roses and my attempt at making leaves with icing:
We then learnt how to ice using thicker cream cheese type icings, which you need a lot of. You would use these icings for cakes such as hummingbird or carrot cake. The process was the same as above, smoothing over the icing at the end like you would with the ganache, only with a lot more icing. You can then cover the icing in coconut by filling one hand with the coconut and then rolling your cupcake in it with your other hand. This is my attempt, with the rose and leaves to decorate:
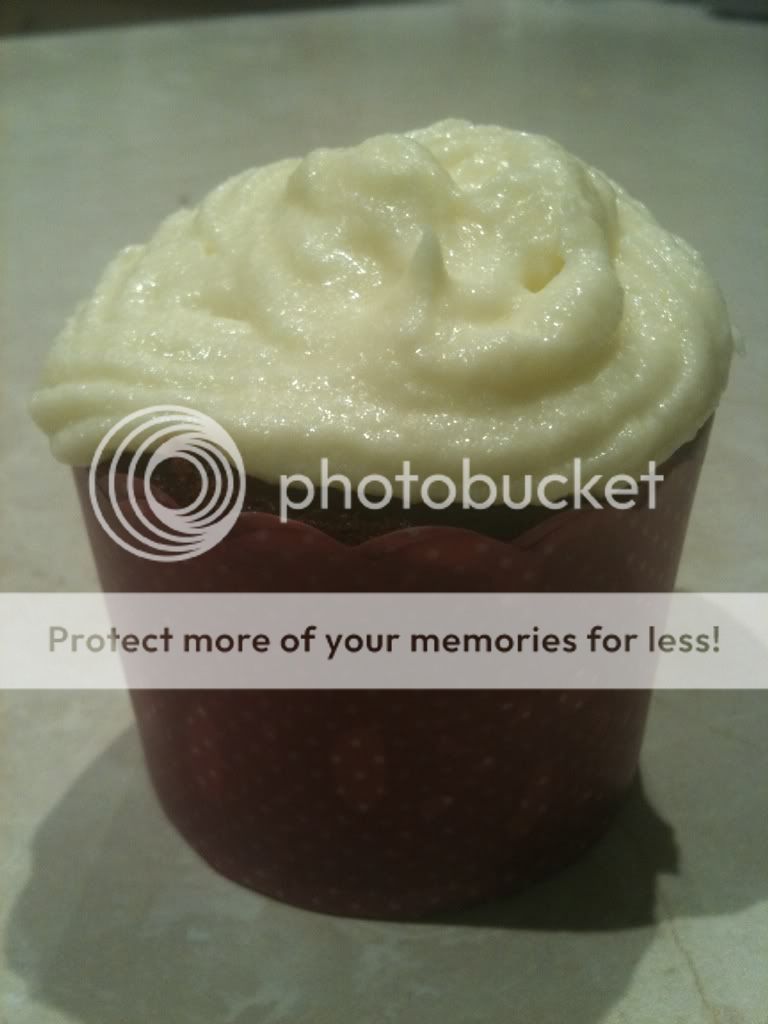
We then went on to using the piping bags, which I haven't had a lot of practise with. We started out with an easy design, which I'd done before with my tupperware piping ball called the Soft Serve Style. This ends up looking pretty much like a soft serve ice cream, hence the name, and I like the look of this design. It's simple, yet effective. This is my attempt, using a little bit of glitter, a flower and some little balls to decorate:
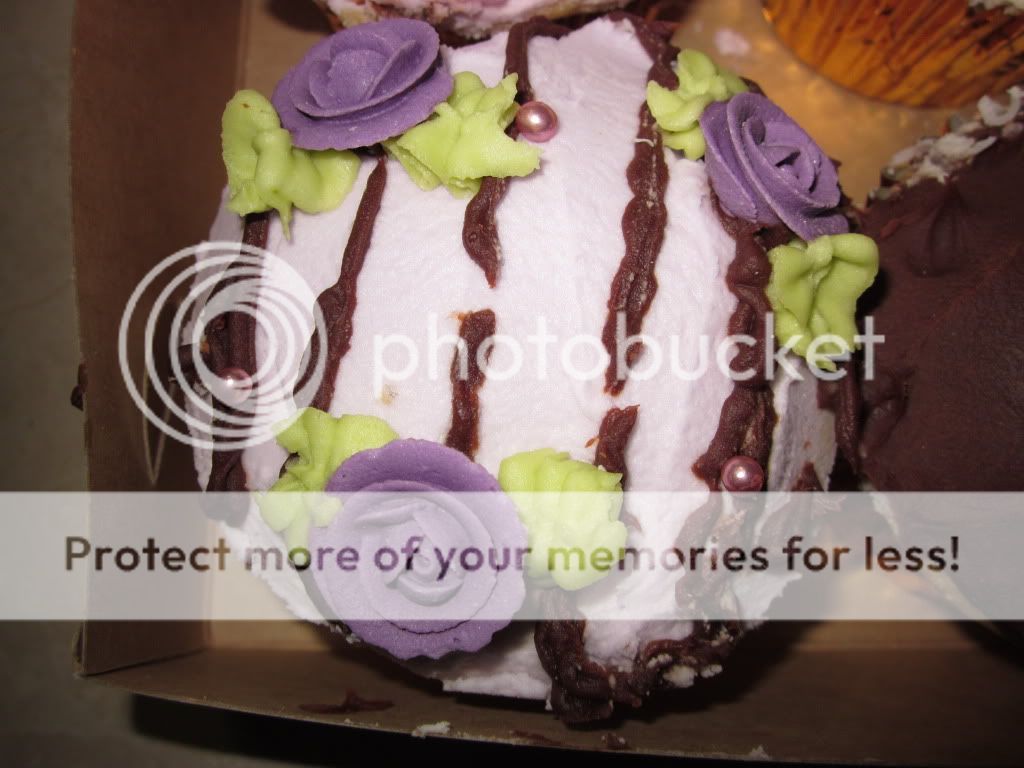
Jennifer then taught us how to create leaves using tip 68. She created what looked like a little topiary on  top of her cupcake, which looked fantastic! I did a little bit of this on one of my cupcakes, but didn't cover the whole thing like she did. On this cupcake I also used the Lattice Design that she showed us which you create with a star tip (number 16). She taught us that when you create lines with icing, you touch the piping tip down at the start, then lift it and pull until you can touch it back to the cake at the end. This is my attempt at the Lattice design, which I wasn't sure about - I thought I did a little bit too much with this cake because it was the one I added the topiary design too as well, plus two flowers on top:
She then taught us, using a similar method to the Lattice Design, to write using the piping bag. I didn't do any writing on my cupcake, but I did do a design using this method with a ganache icing. I struggled a little with this one, as the icing kept stopping and the lines were breaking. So it's not the neatest attempt. I also added a couple of flowers which I added icing leaves to:
Jennifer then showed us how to create a rose on top of a cupcake. This one turned out amazing looking, although I was a little too intimidated to try that one. I'd like to try it one day at home, but I didn't want to mess it up too much in front of everyone!
And here are my 6 cupcakes again:
I enjoyed doing this class, and I'm glad I did it because I learnt so much that I'll be able to use in the future. I did feel that I was maybe ignored a little bit, as Jennifer went around the table and helped what seemed to be everyone else out and didn't say anything to me. I'm not sure if this was because the others were there for professional reasons whereas I was only there for fun, but I wasn't very impressed by that. I'm not saying it was intentional, but it was just how I was left feeling. I was so proud of the cupcakes I'd created though, and I intend to design my cupcakes like these in the future - not just the same way I have been doing all this time!

Teacher: Jennifer Graham
Location: CAE, Flinders Lane, Melbourne
Crabapple Bakery Cupcake Cookbook

May 20, 2011

Sour Cream Raspberry Cupcakes with Cream Cheese Frosting

I've been fascinated by the cupcakes on the Ming Makes Cupcakes site for a while now, and like most recipes have been wanting to try at least one of them for a while. The pictures of the cupcakes just look so inviting and delicious! When I had the chance to choose one of the recipes to make yesterday it was so hard to choose which one. I ended up choosing the Sour Cream Raspberry Cupcakes with Cream Cheese Frosting. My Mum is putting on a lunch today for my sister and cousin so I thought I'd help her out and bake these for it.
Ingredients:
  • 1 cup flour
  • 1/2 tsp baking soda
  • pinch of salt
  • 125g butter
  • 3/4 cup sugar
  • 1 egg
  • 1/4 tsp vanilla
  • 1/2 cup sour cream
  • 1 1/2 cups raspberries
For the frosting:
  • 115g cream cheese, room temp
  • 75g butter, room temp
  • 2 cups icing sugar
  • 1/2 tsp vanilla
Instructions:
1. Preheat oven to 180 degrees Celsius. In one bowl, mix together the flour, baking soda and salt.
2. In a seperate bowl, using an electric mixer, cream butter and sugar until light and fluffy.
3. Reduce the speed of the electric mixer to low and add vanilla and egg. Mix until combined.
4. Mix in the sour cream.
5. And then add the flour mixture and mix until combined.
6. Then gently stir in the raspberries.
7. Fill your cupcake papers about 3/4 with the mixture and bake in your preheated oven for 20 minutes, or until a skewer, or toothpick, comes out clean.
For the Frosting:
Mix all the ingredients together by hand. Once combined, whip with an electric mixer until light and fluffy. Spread the frosting over the top of the cooled cupcakes and top with additional raspberries, if you wish. (I had used frozen raspberries in my mixture so didn't add them to the top of my cupcakes as they tend to 'bleed')
Recipe Source:
Ming Makes Cupcakes recipe for
Sour Cream Raspberry Cupcakes with Cream Cheese Frosting

March 23, 2011

Red Velvet Cupcakes

I know I've already posted about Red Velvet Cupcakes on this blog in the past, but I wanted to share them with you again. I can't get enough of these wonderful, soft, moist cupcakes. They're usually my go to when I need something to bake that I know will turn out well, and I often get requests to make them for various occassions. Recently my sister Andrea approached me about doing some baking for my niece, Ruby's christening. She requested these Red Velvet Cupcakes and a White Chocolate Mud cake (which I'll post about soon). I found these beautiful Robert Gordon patty pans in a cooking shop in the Melbourne CBD and just had to buy some to use for the cupcakes. Perfect for a little girl I think!
My sister had about 20-25 people coming so I wanted to aim for everyone to get at least one cupcake each. I started off making just one batch first to see how many I could get, and then made a second batch, ending up with about 30 cakes in total. I was able to stick with one batch of the cream cheese frosting mixture though, as it was enough to cover all the cupcakes.
Ingredients:
2 1/2 cups cake flour (to make cake flour - for each cup of cake flour required replace 2 tbsp of plain flour with 2 tbsp corn flour)
2 tbsp Cocoa Powder
1 tsp salt
1 1/2 cups caster sugar
1 1/2 cups vegetable oil
2 eggs
1/2 tsp red gel food colouring
1 tsp vanilla
1 cup buttermilk
1 1/2 tsp baking soda
2 tsp white vinegar
1. Preheat oven to 350 degrees. Line standard muffin tins with paper liners. Whisk together cake flour, cocoa and salt.
2. With an electric mixer on medium-high speed, whisk together sugar and oil until combined. Add eggs, one at a time, beating until each is incorporated, scraping down sides of bowl as needed. Mix in food color and vanilla.
3. Reduce speed to low. Add flour mixture in three batches, alternating with two additions of buttermilk, and whisking well after each. Stir together the baking soda and vinegar in a small bowl (it will foam); add mixture to the batter, and mix on medium speed 10 seconds.
4. Divide batter evenly among lined cups, filling each three-quarters full. Bake, rotating tins halfway through, until a cake tester inserted in centers comes out clean, about 20 minutes.
Transfer tins to wire racks to cool completely before removing cupcakes. Cupcakes can be stored overnight at room temperature, or frozen up to 2 months, in airtight containers.
5. To finish, use a small offset spatula to spread cupcakes with frosting. Refrigerate up to 3 days in airtight containers; bring to room temperature before serving.

Recipe Source:
Martha Stewart website
Red Velvet Cupcakes

March 8, 2011

Ming Makes Cupcakes

I haven't done this in a while I know, but every now and then I plan to share a great blog that I love looking at. This time I wanted to share a blog called Ming Makes Cupcakes which makes me drool every time I visit there! There are not only 33 fantastic sounding cupcake recipes on the site but also a few savoury and cookie recipes. I love how the recipes are each laid out like a recipe card. There are also some fantastic photos of the amazing looking cupcakes, which I must admit have made me tempted to lick the screen on more than one occasion. A couple of cupcakes that are guilty of this in particular are the Vanilla Almond cupcakes with Maple Cream Cheese Frosting and the Coffee Chocolate Cupcakes with Baileys Irish Cream Frosting!
I'm really looking forward to trying at least one of these recipes one day. The sooner the better, I think! I definitely recommend you making a visit to Ming's website. 

October 26, 2010

Red Velvet Halloween cupcakes

Sorry for the delay in posting! I finally had my first chance to bake since I started this blog. My Mum's patchwork group decided that their meeting would be Halloween themed (despite the fact that we don't celebrate Halloween in Australia - a fact that I'm terribly sad about) so I volunteered to help her out on the 'bring a dish' side of things. I decided to go with my personal favourites, Red Velvet cupcakes because of the red colour and the fact that they always get compliments when I cook them. I, of course, used Martha Stewart's recipe which you can find on her website.
Hm can you tell that I went just a little overboard with the red food dye? I figured it was okay though because the 'blood red' colour fits in with the Halloween theme! lol Lucky!
This is what the cakes looked like after I'd taken them out of the oven. I'm amazed at how most of them pretty much turned out the same size. That never happens for me!
And here's the finished product after I'd iced them. I used a cream cheese icing and left half of the cakes a natural white-ish colour and made the rest orange, as you can see. Luckily I had no disasters with these (well except for the state of the kitchen after I'd finished, but that's normal for me lol), I think they all turned out really lovely. All the harder for me not to try one!

Happy Halloween everyone!

share post

Facebook